![Logotype-primary (1).png]](https://knowledgebase.getvim.com/hs-fs/hubfs/Knowledge%20Base/Logotype-primary%20(1).png?height=50&name=Logotype-primary%20(1).png)
Getting Started with Vim Connect
Vim Connect enables in-EHR access to clinical tools and data by installing a lightweight app on each workstation. This guide walks you through installing Vim Connect on a Windows computer, verifying setup, and confirming you're ready to begin using Vim inside your EHR.
Step 1: Download the MSI File
Before starting, close all open instances of your Electronic Health Record (EHR) system. Then, click the download link below that matches your EHR platform to download the Vim Connect installer (MSI file):
- eClinicalWorks: https://vim.health/desktop_ecw
- Athena or Practice Fusion: https://vim.health/vim_connect
- NextGen: https://vim.health/desktop_nextgen
- Elation: https://vim.health/vim_connect
💡 If the download doesn’t start automatically, right-click the link and choose “Open in new tab” or “Save link as…” to manually trigger it. Make sure your browser allows downloads from vim.health.
Step 2: Run the Installer
-
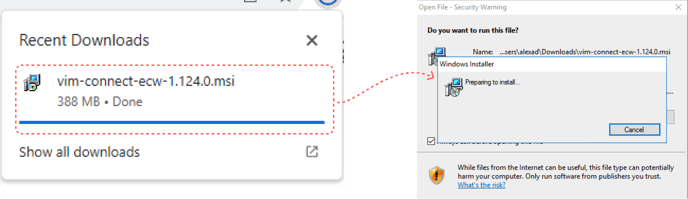
Click the downloaded MSI file and select “Open when done”
-
When prompted, allow the installer to run
-
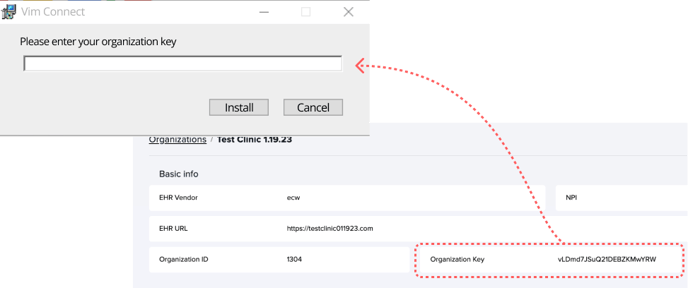
Enter your Organization Key when prompted
-
-
Find this in the Organization tab of Vim Console
-
If you don’t have access, contact your Vim Admin or email support@getvim.com
-
-
-
A progress bar will display the installation status
-
The installer will close automatically once setup is complete
💡 Your Organization Key is a unique code that links the install to your practice. It's only needed once — copy and paste carefully to avoid errors.
Step 3: Launch Vim Connect
- Open the Windows Start Menu
- Search for "Vim" and double-click Vim Connect to launch
- The app will run in your system tray (bottom-right corner of your screen)
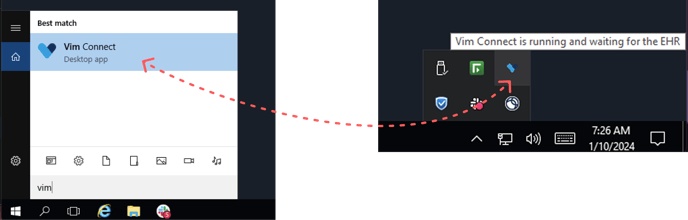
💡 You won’t see a full window. Look for the blue Vim heart icon in your system tray to confirm Vim Connect is running.
Step 4: Verify the Chrome Extension

- Restart Google Chrome
- Click the Extensions icon (puzzle piece) in the top-right corner
- Find Vim Connect in the list
- Click the pin icon to keep it visible in your browser bar
💡 Pinning the extension helps you keep track of Vim’s status — it will turn blue when patient-specific insights are available.
Step 5: Log Into Your EHR
- Log in to your EHR as usual
- Vim Connect is now installed and ready to use!
💡 After logging in, the Vim heart icon will appear inside your EHR—usually in the top-right corner. It starts grey and turns blue when patient-specific insights are available.
Watch the Windows Installation Demo
Want to see the full process in action? This short video walks through each step of installing Vim Connect on a Windows device.